Creating Rembrandt Lighting + Look in Portraitiure

Messages
123
Name
kane
Edit My Images
No
I have a shoot planned in a very old museum in my village, it's so great a place that the BBC even used it for filming a period drama set in the 1700s I belive it was. They even dressed it up a bit more and added in lime plaster walls and aged it to the point where you would be mistaken if you were not actually back in time.
I have a shoot planned and want to make it look like a Rembrandt painting. The model has a very interesting DNA makeup which is really going to add to the pictures.
I wanted people's thoughts on lighting.

Keeping in with Rembrandt, it naturally has to have a huge element of chiaroscuro for dramataic lighting.
I am going to use different scrims to block light out, as we will be shooting in early morning for hopeful deep warm sun (still using scrims to block out or use colour scrim to add warmths).
I also wanted to shoot with lots of candle lighting (not in the shot, but to illuminate and add warmth top skins).
I will only have one flash gun (AD200) but may try to borrow another for very soft fill light.
There will be lots of diffusion and very low light pops to make sure i get that soft 'painterly' look (when not using solley candles).
I will experiment will all of the above.

Has anyone ever tried to make their portraits look like a Rembrandt painting? Any examples you want to post up?
Any tips on equipment?

I will be using my Canon 5DMK3, 70-200ii, Rollie Carbon tripod and geared head for fine tuning, AD200 with diffusion (though I do not own a soft box or octobox - may get one for this shoot).

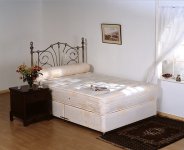
Picture is of the location. (obvioulsy it's very bright here, was just a phone pic on a scouting mission).WhatsApp Image 2024-10-13 at 19.00.04.jpeg
 
An interesting thread, it's actually about lighting instead of the latest gadgets:)

Rembrandt Lighting is a classic for portraits, although as with most techniques it comes and goes in and out of fashion. It used to be pretty popular until so-called high-key lighting white background became the popular way of lighting portraits, and now Rembrandt is becoming popular again.

Rembrandt Harmenszoon van Rijn was far more than just a portrait photographer but that’s what most people seem to know him as, and even his portraits involved very different lighting, but basically “Rembrandt Lighting” means classical single-light portraits with the light 45 degrees off to the left-hand side and pointing down at an angle of 45 degrees too.

Here are two examples of his classic Rembrandt lighting.

This portrait of his own father,
Rembrandt_father.jpg
(RKDimages, Art-work number 284532, Public Domain, https://commons.wikimedia.org/w/index.php?curid=71062581) is classic Rembrandt lighting

About the only thing that Rembrandt and I have in common is that we will use lighting techniques where we think they suit the mood, they are subject-agnostic and can be used in many situations. In theory, we do have painting in common too, but he was good at it and I’m not

He used the same type of “lighting” for his only known Seascape.
Rembrandt_Christ_in_the_Storm_on_the_Lake_of_Galilee.jpg
www.gardnermuseum.org : Home : Info : Pic, Public Domain, https://commons.wikimedia.org/w/index.php?curid=6812612

Neither of these involve chiaroscuro, it's a useful technique but there's no "obvious need" for it.

As photographers, we can create very different lighting effects – we can produce hard, gritty lighting simply by using a small light a long way from the subject, we can produce soft, flattering lighting by using a large light close to the subject, or anything in between, just as Rembrandt could do.

Painters use their vision, skill and tools to introduce detail into shadow areas when they want to, but photographers need to use fill lighting to do so, and many of them completely ruin what they think is Rembrandt lighting by adding too much fill, or putting the fill light in the wrong place, or both. So yes, you'll almost certainly need to use a fill light, the trick is to use just enough to create just enough shadow detail. I
The fill light should be on-axis to the camera and literally any flash will do, as long as you can turn the power down far enough . . .

You talk about using a lot of diffusion - why do you think that diffusion will help you?

You basically have a choice of extremes, or something somewhere between them.
1. A small, distant light to create drama and hard shadows.
2. A large softbox or similar, close to the subject to create gentle, soft shadows.
3. Any variable of 1 or 2, all will give very different results and all are valid. The right choice is the one that you like.

But diffusion doesn't change either the actual or the relative size of the light, so although it might add an interesting effect, it won't really work.
 
An interesting thread, it's actually about lighting instead of the latest gadgets:)

............

Thanks for your input, I will be sure to read this agaim, some good points.
You are correct on asking why I feel I need disffusion, the simple answer is I don't know why I think that . It seems I may not, but I may still play about and experiment.
I have the courage to the approch it with a less is more attitide (not use every available light source feeling I need to light every available angle). I really want depth and darkness (just like those Rembrandt's and Caravaggio's! But more than anything I want to achieve a "painterly" look (I know that term is thrown around these days but I definitely want to approach it with respect).
 
I don't really know what a "painterly" look is, but if you check out the work of our own @Scooter, mainly in the Talk Nude & Glamour forum, https://www.talkphotography.co.uk/forums/photos-nude-and-glamour.46/ you may get some inspiration. I know that he doesn't read anything that I write, so I don't mind saying that he's good:)
I hang on your every word Garry! I am absolutely flattered that you think I'm any good :)

One of my favourite "art trivia questions" to ask people, when they talk about Rembrandt lighting is, "Yeah, but can you tell me Rembrandt's first name?" But I see you've busted me this time around.
 
I hang on your every word Garry! I am absolutely flattered that you think I'm any good :)

One of my favourite "art trivia questions" to ask people, when they talk about Rembrandt lighting is, "Yeah, but can you tell me Rembrandt's first name?" But I see you've busted me this time around.
Flattering, but b*****ks.

Basically I’m just a technician, I see lighting in terms of physics and trigonometric ratios, which tell me what can’t work, and then I apply whatever creativity I have to what can work – useful skills and knowledge, but I’ve never really been a creative, and I retired 8 years ago, so I’m either a has-been or a never-been. I used to do a bit of creative writing, but stopped doing that when I no longer needed to be registered for VAT :exit:

I think that my initial response to this thread has used up what little understanding of Rembrandt lighting I have, but I’m hoping that creative people such as @Scooter (there are others too) can make better contributions . . .
 
I’m certainly not an expert, and my lighting experience is also from a technical rather than artistic viewpoint.

I realised years ago that all my disparate pastimes and jobs had the same core, I’m a problem solver.

Looking at the image the OP has posted, I’m seeing a well lit interior from a decent sized window camera right. And the first ‘problem’ I see is that it’s making a good job of lighting quite a light coloured cupboard door.

So the first part of any lighting solution for a subject sat anywhere round that table is either reduce the light falling on the doors (flag) or simply overpower it with flash on the subject.

So; @mrk123 where are you planning to put your subject, and how much leeway do you have to rearrange the furniture?

I see flags rather than diffusion being the key to controlling the window light, and once that’s controlled, creating the light for the subject is dead straightforward, though again, it’s likely it’ll need flagging and use of the ISL to control its spill. And depending on subject position, either some of the window light or a flash as key.
 
Last edited:
I’m certainly not an expert, and my lighting experience is also from a technical rather than artistic viewpoint.

I realised years ago that all my disparate pastimes and jobs had the same core, I’m a problem solver.

Looking at the image the OP has posted, I’m seeing a well lit interior from a decent sized window camera right. And the first ‘problem’ I see is that it’s making a good job of lighting quite a light coloured cupboard door.

So the first part of any lighting solution for a subject sat anywhere round that table is either reduce the light falling on the doors (flag) or simply overpower it with flash on the subject.

So; @mrk123 where are you planning to put your subject, and how much leeway do you have to rearrange the furniture?

I see flags rather than diffusion being the key to controlling the window light, and once that’s controlled, creating the light for the subject is dead straightforward, though again, it’s likely it’ll need flagging and use of the ISL to control its spill. And depending on subject position, either some of the window light or a flash as key.
Yes the light from that window is certainly bright, bear in mind this was 2pm so brightest part of the day, but it was also very overcast so gopd forbid on a bright sunny day.
I plan to start the shoot at 9am, as the sun rises from that window, hoping to get warm dusty vibes, I will also use a light misting machine to add drama and bouce the light about.
I can move the furniture freely. Some back/side light might be a nice touch too.

As for model placement, I will move her around, but in my mind I am keen to really darken the background out and have string key light (but still soft and 'painterly'.. See image below for my inspiration (clearly lacking Rembrandt lighting). It is of course Rembrandt and it is called 'Girl on Windowcill'. This is the sort of mood I want to create.
Flags... ??? You mean sheets with cut out and some light modification? Why do you suggest this? To break the light up? Add shadows like they have come through a tree?
I am keen to block a lot of that light out, if not stop it down considerably.
And of course a Rembrandt light set up, high above, 45 degrees to one side of model / face.
Lots of experimentation to go on.

If there is one thing I know, it is that I know nothing :)
rembrandt.jpg
 
Yes the light from that window is certainly bright, bear in mind this was 2pm so brightest part of the day, but it was also very overcast so gopd forbid on a bright sunny day.
Brightness of the light isn’t really an issue, because it’s simple maths, all you’re doing with ‘brightness’ is creating a ratio. (All flash exposures are a balance of the flash and the ambient).
I can move the furniture freely. Some back/side light might be a nice touch too.
If you can move all the furniture that’s a real bonus because it adds to the control you have over that window light.
See image below for my inspiration (clearly lacking Rembrandt lighting). It is of course Rembrandt and it is called 'Girl on Windowcill'. This is the sort of mood I want to create.
There’s a hint of the drama of chiaroscuro in that image as the well lit white shirt has a dark background.
Of course for the full effect the side of the subject in front of the lit background would be in shadow.

A small gridded softbox close to the subject will produce that light, that then just leaves you to work out how to light the background with a similar level of control, I’d use another flash, but you could try to control the window light down to that.

Or indeed the opposite, flag the window light down to be the key on the subject, and focus a flash to create the pool of light on the background.
Flags... ??? You mean sheets with cut out and some light modification? Why do you suggest this? To break the light up? Add shadows like they have come through a tree?
Flags are objects that block light. Counterintuitively you can hold a reflector over the window to narrow and reduce the light coming through, to stop it ‘flooding’ the room with light and get it to create a spot on the background.
For info smaller objects put in front of a light source to create patterns are called Gobo’s (they go between the light and subject).
If there is one thing I know, it is that I know nothing :)
And this is why you shouldn’t think that you can just ‘experiment and see what works’.


Trial and error takes a very long time, and I’m gonna guess that you haven’t got all day in the location, and that the subject doesn’t have endless patience. If I know anything about shooting kids, it’s that you need to set everything up exactly how you need it before introducing the ‘talent’.
 
Breaking this up cos I don’t want to over do this.

I’m far from an expert, but I do have a bit of time to write today.

The most important lesson you can learn for lighting is how to ‘read’ an image.

Before photographers learn about light, they think that ‘brightness’ is the most important thing, because they’ve been studying the bloody exposure triangle and they wrongly believe that ‘correct exposure’ is the only important issue. But ‘light’ is much more than that, it’s a composition tool, and the direction, colour and nature of the light is much more important than just how bright it is.

Have a look at the lighting challenges, read Garry’s explanations, so you can understand how ‘softness’ and hardness, affect shadows, and that shadows are what you’re aiming to control.

Back to my first point, your ambient light source is too big and too close to those doors for the look you’re trying to achieve. So what is your plan to overcome that? Can you control it, or is it easier to block it? Overpower it?

There’s no ‘right way’ of doing it. You’ve loads of options, but they’ll be limited by what you have available.
 
About the best oil painting effect I've seen is photoshop pixleblender. Not sure it's still available now though. I tried it on the pic you posted at in this thread but as you have no editing of your images I wont post it.
If you want to see it PM me.
 
Given the setting and desired goal.

All you need to do is set the ambient exposure to drop the scene to an appropriate level. Then use the AD200 to create the singular hard light from the upper 45-60˚.
I would use it bare bulb with the reflector, or maybe with one of the small octabox/BD modifiers. You could also use the fresnel head, but IDK if you want it quite that hard.

Use panels to bounce light for fill as needed. Use a warmer WB setting (e.g. shade) to add warmth, or add it in post. I would only use candles as suited the composition.
 
Last edited:
My random thoughts . . .

I agree with what everyone else has said.

I see the window as a challenge that needs to be overcome, not an asset - natural light is great for some things, but my own view is that it's usually a nuisance for any kind of studio shots, partly because it's very variable in terms of intensity, hardness/softness and colour temperature. And we don't need it because if we actually want window light we can easily create it with a large softbox or similar, we can even create glazing bars with sticky tape.

So, you might want to consider shooting at night, to avoid the window light problems altogether, or cover it up to stop the light completely, or place a scrim over it to reduce the amount of light dramatically (and then increase the light contribution if required by using a longer shutter speed to create the right amount of natural light contribution).

Then start the job by placing your subject in position, but use a mannequin head or anything else, because it will take too long and will take too much out of the model if you use a live person for the setup.

Then work out your camera position, including height, stick it on a tripod.

Then introduce your key light, which will do about 90% of the work. Try using the light barebulb, and with a standard reflector, and with a softbox, at varying distances. Rembrandt lighting always comes from 45 degrees to camera left, and 45 degrees from above. Remember that the function of this light isn't really to create the light, it's to create the right shadows in the right places.

Then, but only if necessary, add a fill light, on axis with the lens. This means that it needs to be a large light behind the camera or a smaller light only just above it,

Then, and if required, add any extra lights for effect, one at a time.

Then, finally, light the background, which is an entirely separate subject,

And finally, post your results here, so that we can give more specific advice, but you should now have enough to get started.
 

Attachments

  • old bed photo.jpg
    old bed photo.jpg
    211.3 KB · Views: 13
Last edited:
Flags are objects that block light. Counterintuitively you can hold a reflector over the window to narrow and reduce the light coming through, to stop it ‘flooding’ the room with light and get it to create a spot on the background.
For info smaller objects put in front of a light source to create patterns are called Gobo’s (they go between the light and subject).

I am definitely keen to blockk that light out one way or another, of course I can move furniture so I could turn the desk and / or chair the opposite way leading into the light, but as you know I am really wanting to create drama and depth so the less light the better in my opinion.

A small gridded softbox close to the subject will produce that light, that then just leaves you to work out how to light the background with a similar level of control, I’d use another flash, but you could try to control the window light down to that.
I don't own a grid or octo style box but may get one for this shoot, and in the end I just got a new Godox V860ii (not the AD200) as I figured I would get more use from a more controllable flash for now.

Trial and error takes a very long time, and I’m gonna guess that you haven’t got all day in the location, and that the subject doesn’t have endless patience. If I know anything about shooting kids, it’s that you need to set everything up exactly how you need it before introducing the ‘talent’.

Good shout, I may go prior to the model and get things set up, I will be picking her up but it's not too far.

All you need to do is set the ambient exposure to drop the scene to an appropriate level. Then use the AD200 to create the singular hard light from the upper 45-60˚.
I would use it bare bulb with the reflector, or maybe with one of the small octabox/BD modifiers. You could also use the fresnel head, but IDK if you want it quite that hard.

I do want it bad but investing that into gear I may not use too much might be too much right now, an idea to make my own?
But you suggest strong harsh light beam in the Rembrandt way, directed mostly around the model's face and body?

So, you might want to consider shooting at night, to avoid the window light problems altogether, or cover it up to stop the light completely, or place a scrim over it to reduce the amount of light dramatically (and then increase the light contribution if required by using a longer shutter speed to create the right amount of natural light contribution).

Good shout actually, that window, is positioned so the sun is strongest in the morning, I might help myself by moving the shoot to around 4pm... It's light till around 6.30pm in the UK right now, so that might lead itself nicely with a darker more diffused light and ultimately darkness.

Then introduce your key light, which will do about 90% of the work. Try using the light barebulb, and with a standard reflector, and with a softbox, at varying distances.

Bare bulb and reflector? How are you doing this?

I will definitely post results, the shoot is planned for a week on Saturday.
 
Bare bulb and reflector? How are you doing this?
1729029696240.png
Bare bulb

1729029884954.png

standard reflector

As I appreciate that we often use terms that seem obvious to us, but are foreign to others.

The bare bulb is the advantage that the AD200 has over a speedlight, when you use modifiers (softbox, snoot, reflector, brolly, Octa etc) they are designed to work with a bare bulb.

A speedlight is a flashtube, surrounded by a mirrored reflector focussing the light with the use of a fresnel lens, it's already modified in a very specific way (designed to throw the light forward focussed quite narrowly - to enable the maker to exaggerate it's Guide Number / effective power), meaning that adding other modifiers creates a fight with it's existing design.

Hope that helps.
 
Last edited:
I am definitely keen to blockk that light out one way or another, of course I can move furniture so I could turn the desk and / or chair the opposite way leading into the light, but as you know I am really wanting to create drama and depth so the less light the better in my opinion.
It's about the quality of light (position, direction, type of light modifer) not about the quantity of light
Bare bulb and reflector? How are you doing this?

I will definitely post results, the shoot is planned for a week on Saturday.
A bare bulb (your AD200 with nothing fitted to it) is just that. In terms of effect, think of the sun on a cloudless day. The downside is that the lack of a reflector or other modifier is likely to create lens flare, but this can be prevented with a flag between the light and the camera.

A standard reflector is the reflector normally supplied with the flash. If I wanted to be pedantic I would say that what Godox now calls a standard reflector is better described as an umbrella reflector, but it will do.

Edit: Crossed with @Phil V post on reflectors
 
But now you have a speedlight, the next obvious thing to buy is one of these softboxes (60cm is cheaper), and a decent stand. Presuming you already got a transmitter?
Oh yes I have all that. I am not a beginner. But don't claim to be a pro either, btu I can definitely shoot and understand and feel lighting.
I just don't have a big box. Though I will try to get one... I will have my V860II Godox and the Transmitter (fancy one with LCD). but just as to what light mod to use.
Here's a pic I got at a wedding, all light from inside the building - flash packed in mid wedding but thankfully I found a way :)
NAYHA-+-HAROON-SHARIF---BARAT---DAY-1---AUGUST-2024-323.jpg
 
It's about the quality of light (position, direction, type of light modifer) not about the quantity of light

A bare bulb (your AD200 with nothing fitted to it) is just that. In terms of effect, think of the sun on a cloudless day. The downside is that the lack of a reflector or other modifier is likely to create lens flare, but this can be prevented with a flag between the light and the camera.

A standard reflector is the reflector normally supplied with the flash. If I wanted to be pedantic I would say that what Godox now calls a standard reflector is better described as an umbrella reflector, but it will do.

Edit: Crossed with @Phil V post on reflectors
Will definitely look into a reflector to use use use with my v860ii (not gone for the AD now).
Until I get a proper one, I am sure a home made card rolled around the flash head will do?
So no soft / modifier / diffusion in front of key light?
 
Last edited:
Back
Top