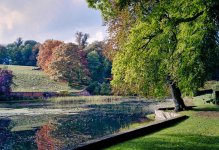
Can we do some comparison negative scan conversion comparisons?

ChrisR

I'm a well known grump...
Messages
11,052
Name
Chris
Edit My Images
Yes
There seem to be quite a lot of different software packages now available to invert scans of negatives, so I thought it would be interesting to try some comparisons. @FishyFish has shown us some comparisons of conversions done with NLP and G2P, but if possible I'd like to go wider!

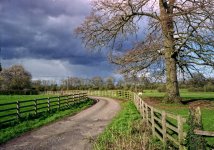
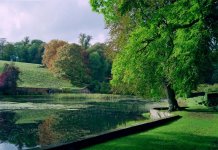
I have scanned 3 frames of Agfa Vista 200 taken with my Olympus mjuII last year as positives, and saved them as 48-bit TIFFs and 48-bit VUESCAN/Plistek RAWs in my Dropbox. They should be accessible at https://www.dropbox.com/scl/fo/gsd57lavej9mw1ix1i8xx/h?rlkey=6fml498orf0due8hp6c3bc0sg&dl=0 .

If any folk on here who have any of ColorPerfect/ColorNeg, CNMY, darktable negadoctor, Grain2Pixel, Negative Lab Pro/NLP, ScanConvert or any other software or technique would be willing to have a go at converting these, and post the results here I'd be grateful! Using Vuescan to re-process the RAW is also an option, which I might have a go at, although there may be others better at this. If anyone has SilverFast AI Studio it might be interesting to try processing the VUESCAN RAWs. I recently found I could import Vuescan RAW files into Capture One Pro and process them there, but that was using scans of slide film.

NB the two files Vista200T02.tif and Vista200RAW02.tif represent a heavily scratched film frame; I didn't realise this until I scanned it, as Filmdev did such a great job of their touch-up in the dev/scan! I decided tp include it as the light is different and there are more colours. I did let VUESCAN do a light IR filter pass, which doesn't seem to have done much good, but I'm not sure of the effect of that on the RAW file.

I set up Vuescan to scan slides, generic colour slides, default colour space (I do have an IT.8 profile, and when I tried using it there was a huge shift of colours in the Preview, so I decided for the moment to go back to default). I should have asked Nige @FishyFish what settings he uses before starting this!

I've also launched this on Mastodon, where I am @carusb@photog.social, and I'll try doing it on BlueSky and Twitter (now X) as well. I'll try to get permission to share any results on here; I've already got one using darktable from the scratched frame and it looks pretty good for "2 minutes playing around"!
 
Nice idea. Some quick and dirty conversions.. 2 for each 48bit raw. One in Vuescan (x32, v.9.6.47, all defaults, wb left on auto), the other in Colorperfect 2.25 (all defaults, Agfa Vista 200 profile). All images resized and converted to jpeg.

Guess which is which.

#1.1
uZuj1b4.jpg

#1.2
BWYRBUC.jpg


#2.1
OQo3GFB.jpg

#2.2
pU7nwhT.jpg


#3.1
QNIwpLH.jpg

#3.2
cf7rahc.jpg
 
Last edited:
That's great, thanks @trypdal . Of these, 1.1 and 3.2 are closest to the Filmdev scans in my C1Pro catalog; neither of the 2.1/2.2 versions are quite the same colour. I won't show the Filmdev scans here yet; I'm biased by them, but you don't have to be! They did an absolutely fantastic job of cleaning up those scratches though; I'd have abandoned that frame as unrecoverable (rather than as not quite interesting enough!).
 
I did some comparisons on my blog some time ago, using ColorPerfect, Negative Lab Pro, and Grain2Pixel, on scans made with an Epson v700. The results can be seen here:


https://kevinthephotographer.wordpress.com/2020/11/05/converting-scans-from-colour-negative-film/

https://kevinthephotographer.wordpress.com/2020/11/09/more-scan-comparisons-kodak-ekter/

The Wordpress blog software allows the use of a slider to compare two images, which would be lost if I posted the images here, so that's why I've given links to the blog posts.

I should also mention that these posts were written in 2020 and the convertors may have been updated since then.

Since making these comparisons back in 2020, I seem to have got back into the habit of simply using EpsonScan and saving directly to JPEGs.
 
Last edited:
That's a great idea Chris.

Having spent the last month scanning my dad's slides (about 3000) I'm now going to attempt his (and my) colour & B&W negatives.

I'm not exactly scanning though.

I have an LPL 3301D enlarger which converts to a copy stand and mount my camera on it with a macro lens. The lighting is from a Cabin daylight light panel.

The slides have come out pretty good (but took a long time).

I've tried some negatives but with only Lightroom Classic it's a bit of a faff as I have to use curves to make a positive image, then the sliders are all in reverse which makes it a little challenging.
 
I'm happy to give them a try in NLP Chris, but I'd need RAW DNG files. The process for outputting them in Vuescan can be found here: https://www.negativelabpro.com/guide/scanning/
There should be DNG files there now, Nige, although I made them by opening theRAW.tif files in Vuescan and saving them as TIFFs in DNG format. Whether they still count asRAWs, I don't know!

EDIT: so LR won't open RAWs saved as TIFFs?
 
Last edited:
I should also mention that these posts were written in 2020 and the convertors may have been updated since then.

Good point about potential differences due to software updates. I've added software version in my original post. My Vuescan version is pretty old at this point, I don't know if the current one implements a different conversion routine.

As for Colorperfect, I think the version I tested is the current one, which is really old. TBH I think the project is largely abandoned at this stage.
 
Excellent, I don't really know anything about Irfanview!

EDIT: Having read a little, I didn't see anything about inversions, could you say a bit more?


It's not aimed at this kind of work, but as a basic editor it is great

Very simple though.

ctrl+shift N --- reverses the colour
shift U --- auto corrects
shift G --- then add about 20 contrast and reduce the gamma slightly, and if needed use the colour sliders to reduce any dominant colour cast


Season to taste if desired.


Each one takes maybe 10 seconds

I use it often when I want something quick and easy without unnecessary effort.
 
There should be DNG files there now, Nige, although I made them by opening theRAW.tif files in Vuescan and saving them as TIFFs in DNG format. Whether they still count asRAWs, I don't know!

EDIT: so LR won't open RAWs saved as TIFFs?

Hi Chris, it's not the format so much as the process of scanning them. If you don't follow the process as set out in the Negative Lab Pro guide then the conversions will be out of whack with weird exposures and colours. I don't think simply changing the TIFF files to DNGs will work unfortunately.
 
Hi Chris, it's not the format so much as the process of scanning them. If you don't follow the process as set out in the Negative Lab Pro guide then the conversions will be out of whack with weird exposures and colours. I don't think simply changing the TIFF files to DNGs will work unfortunately.
I couldn't see anything particularly different from how I scanned it, Nige. I didn't lock exposure, but I don't think that's a problem for 3 random negatives. It was saved as RAW, just in the TIFF format rather than DNG. I also saved as TIFF, and that was noticeably different from the RAWs.
 
I couldn't see anything particularly different from how I scanned it, Nige. I didn't lock exposure, but I don't think that's a problem for 3 random negatives. It was saved as RAW, just in the TIFF format rather than DNG. I also saved as TIFF, and that was noticeably different from the RAWs.
The ones uploaded are still .tif format, not ,dng. They have to be saved as RAW DNG format, not just RAW (there's a checkbox for this). I tried a conversion on the TIFF files butt they looked horrendous, even if I used the TIFF Prep facility in NLP.
 
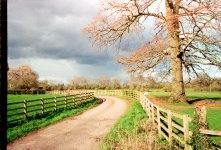
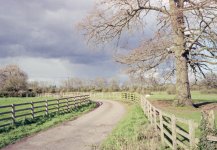
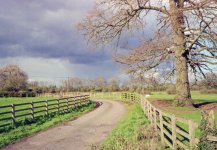
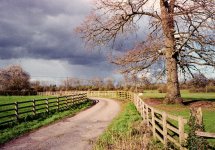
If you take the three images of the trees lining the country lane in each one, especially the last one has the heavy cloud with a blue cast. In actual real life the clouds at that distance and altitude are not blue or even blueish they are actually grey.

The only time that I can say they would be rendered correctly is at high altitude where there is stronger UV.
If that is a result of a scan without alteration then this must indicate scans are rarely100% correct. I have a number of pictures taken at heights over 6000 feet in the Austrian/Italian/Swiss alps which were printed on RA4 paper and appear normal. If the negatives are scanned on either a Nikon film scanner or my Epson flatbed they both give the blue cast although this can be selectively removed quite easily with photoshop.
 
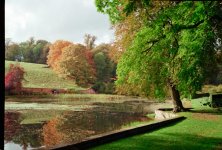
I managed to convert the standard, non-RAW Tiff files using Negative Lab Pro. Not sure if the format will have affected the results vs a RAW DNG file. I didn't spend a lot of time tweaking them, so there's possibly more that could be done with them - the third image, with the lake, doesn't look right to me.


ChrisR-2 by N Fishwick, on Flickr


ChrisR by N Fishwick, on Flickr


ChrisR-3 by N Fishwick, on Flickr
 
If you take the three images of the trees lining the country lane in each one, especially the last one has the heavy cloud with a blue cast. In actual real life the clouds at that distance and altitude are not blue or even blueish they are actually grey.

The only time that I can say they would be rendered correctly is at high altitude where there is stronger UV.
If that is a result of a scan without alteration then this must indicate scans are rarely100% correct. I have a number of pictures taken at heights over 6000 feet in the Austrian/Italian/Swiss alps which were printed on RA4 paper and appear normal. If the negatives are scanned on either a Nikon film scanner or my Epson flatbed they both give the blue cast although this can be selectively removed quite easily with photoshop.
The FilmDev Noritsu scans, which I haven't shared on here yet so as not to bias things, not surprisingly look better than most of these (at least to my eyes... but then of course I saw them first and am probably biased myself). There's definitely an element of blue in those clouds, but nowhere near as "in your face" as some of the blues converters have come up with. The lane photo was taken back in February; it was afternoon light, quite golden-ish, but I can't remember the colour details; nevertheless I reckon I've seen clouds of the sort of colour that Filmdev got.

However, to my mind the point isn't to make the scene entirely true to the original, it's to make a pleasing photo. Of course, if the clouds are the "wrong colour" that obviously hasn't worked for you!
 
I managed to convert the standard, non-RAW Tiff files using Negative Lab Pro. Not sure if the format will have affected the results vs a RAW DNG file. I didn't spend a lot of time tweaking them, so there's possibly more that could be done with them - the third image, with the lake, doesn't look right to me.


ChrisR-2 by N Fishwick, on Flickr


ChrisR by N Fishwick, on Flickr


ChrisR-3 by N Fishwick, on Flickr
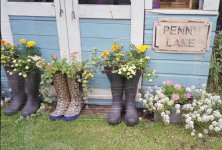
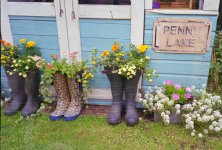
Thanks for trying that, Nige. The reds and greens in that last one look a lot more saturated than in the Noritsu scan.
 
Thanks for trying that, Nige. The reds and greens in that last one look a lot more saturated than in the Noritsu scan.

Yeah. I could have played around with it more to try and get a better result. It's not a like for like comparison with my normal process though.

It might be interesting to try a re-scan of some of my old Poundland Agfa negatives to see how those come out.
 
Yeah. I could have played around with it more to try and get a better result. It's not a like for like comparison with my normal process though.

It might be interesting to try a re-scan of some of my old Poundland Agfa negatives to see how those come out.
As I've just done a dev session, I'll be doing some scanning in the next few days, if I re-scan the cloudy track negative according to NLP's instructions, would you give it another go? Be interesting to try your Agfa as well.
 
However, to my mind the point isn't to make the scene entirely true to the original, it's to make a pleasing photo. Of course, if the clouds are the "wrong colour" that obviously hasn't worked for you!
I think that point is often missed.
If it looks pleasing to the eye, they eye/brain has has managed to make it look like the original, to the viewer :)

I don't mind a slightly blue appearance to clouds, as they do often appear blue, even though they are grey!

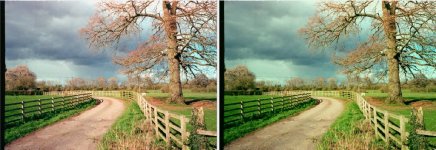
The latter picture has greyer clouds, however, the tree, fence and track appear to have a pink tinge.

It may not seems so to some eyes, but to show what I see, I have take it off the screen here, and put it next to a copy where the red has been reduced a bit. (not a perfect correction, just to show the point)
pc.jpg

Which gets right back yo your point
to my mind the point isn't to make the scene entirely true to the original, it's to make a pleasing photo

Altitude is not the only thing that gives a blue cast, being in the tropics does too during most daylight hours.
Agfa film, especially their slide film used to do this very badly. Kodak and Gratispool were much better, in the same light.

To me, as long as the scan has the detail and the range, it can be made into a pleasing photo, and there is a good chance that the same settings can be applied to all the shots on a roll, or even to several rolls of film, and more sophisticated scanning systems will have presets/profiles for various films and conditions that will make that easier, but what is the most pleasing photo will still be different to different people :)
 
@ChrisR - was the point of the exercise to show the direct output of some of these tools or our favourite interpretation of those outputs?

I'm asking because I'm seeing a few examples with quite strong saturation and contrast and I'm never able to get those out of the box with the tools I have at hand here - they seem to give more of a 'flat' look to be edited further? Those I shared above are 'direct' conversions (resized and converted to 8bit jpg, of course).

Also I just remembered I had a license for yet another tool I had wanted to try, Filmomat by Smart Convert. I will add a three way comparison to the thread.
Well your question is to the point really, as of course we never use these tools as entirely automatic features, we always add a bit of interpretation at least. So we'll always see paertly the tool and partly the person's skill. But nevertheless, I think there's some value in the comparisons anyway. Bearing in mind that most of the tools have preconditions (eg, owning/using LR/PS etc) which might preclude some of them for some folk (I don't have either LR or PS), it would at least be encouraging to see whether a tool that would be usable has produced some feasible results.

I'd be very grateful if you'd try SmartConvert, as I've not found anyone else with it, and was contemplating getting a trial licence myself.

Between here and Mastodon, I think I've got samples of most of the tools I listed, except CNMY. It doesn't offer a trial, o I'd have to sign up to his Patreon. Haven't quite made up my mind so far. I'll have another ask on Mstodon, and maybe twatter and bluesky to see if anyone's got it. Someone on here reported it wasn't much better than a had conversion.
 
Last edited:
ok so this is Colorperfect vs Smartconvert vs 'vanilla' Vuescan

#1
Vuescan


Colorperfect
wdUIK8u.jpg


Filmomat
3SVa0qQ.jpg


#3
Vuescan
QNIwpLH.jpg


Colorperfect
8eUHXbN.jpg


Filmomat
FHbWlvI.jpg


I'm not sure If I'm really using filmomat correctly: I'm feeding it the raw positives, and all of the images had to be severely tweaked to look like the above. I had to tinker with the filmomat sliders to strongly decrease contrast, increase density, and decrease saturation.

This is how one of the images looked in filmomat at default settings


Overall, one thing I enjoy about Colorperfect is the capability to preserve highlights and shadows and offer a very flat starting point. However, it doesn't seem to do well in terms of colour mapping perhaps? Those greens look pretty murky, undifferentiated to me, though much better than Vuescan in the first picture.

Filmomat seems to have a distinctly 'digital/eye popping' look out of the box perhaps? Would need more testing though.
 
Last edited:
Thanks @trypdal , that's great. I'm now planning to get permission from my Mastodon friends to re-post their versions on here. I've thought about (but haven't yet decided) asking those above for permission to post their versions on Mastodon, in both cases attributed as best I can. It might be enough to point the Mastodon folk to this thread once it has all the examples. And to cap it all off, I'll post the Filmdev Noritsu scans.

I've been trying to think of a way, or a place, to show a gallery of all the versions, suitably identified, without the chitchat above. Pretty sure that would be tricky on TP, but maybe a specific thread on the Photos from Film forum, with one post for each too+person?
 
I'm happy to give them a try in NLP Chris, but I'd need RAW DNG files. The process for outputting them in Vuescan can be found here: https://www.negativelabpro.com/guide/scanning/
As I've just done a dev session, I'll be doing some scanning in the next few days, if I re-scan the cloudy track negative according to NLP's instructions, would you give it another go? Be interesting to try your Agfa as well.
Last night I scanned that film in (shortly after re-finding J Riley Stewart's notes on getting the best out of Vuescan, see https://www.jrileystewart.com/blog/unlocking-your-scanner/, which was interesting) and afterwards re-scanned the 3 frames as NLP requires. You should find them in the Dropbox as Vista200RAWrevo1.dng etc.
 
@ChrisR can you provide some info on how these were processed? It seems to me none of the tools are giving perhaps optimal results and one thing I've noticed in the past is that processing can strongly influence the rendition of the final image.

As I learnt the hard way, even a degree centigrade off during processing can determine pretty strong colour shifts that end up visible later on.

Old or expired chemistry can be problematic too I found. I used a small local lab to process my c41. I remember being always unhappy with how my Portra inversions used to turn out. I had initially placed the blame on myself and on the film.

It turns out the results completely changed when I started using another lab, a large commercial one with fast turnaround and many customers. One of the techs told me that some smaller labs tend to squeeze the chemistry as much as possible but labs their size have strict policies for chemistry refreshes and temp control. Lo and behold my inverted Portra negatives were night and day better when I switched to the big lab.
 
Last edited:
All the results so far it seems would be OK with some fine adjustments to suit personal tastes.

Nothing stands out as boing the best by far.

Two questions, what is boing hoped for, and why pay for specialised software unless there is a commercial reason to do so? (such as so much to scan that presets etc may be helpful)

It's interesting to see the different results, but the main thing I have learnt is that I don't need any "special" software or method, and it wouldn't help me to get better results :)

I've had a marked improvement in my colour scans since using Negative Lab Pro. I get outliers where the conversion is difficult sometimes, but mostly the scans look really good even without tweaks. I'm in control of the entire process though in that case.
 
@ChrisR can you provide some info on how these were processed? It seems to me none of the tools are giving perhaps optimal results and one thing I've noticed in the past is that processing can strongly influence the rendition of the final image.

As I learnt the hard way, even a degree centigrade off during processing can determine pretty strong colour shifts that end up visible later on.

Old or expired chemistry can be problematic too I found. I used a small local lab to process my c41. I remember being always unhappy with how my Portra inversions used to turn out. I had initially placed the blame on myself and on the film.

It turns out the results completely changed when I started using another lab, a large commercial one with fast turnaround and many customers. One of the techs told me that some smaller labs tend to squeeze the chemistry as much as possible but labs their size have strict policies for chemistry refreshes and temp control. Lo and behold my inverted Portra negatives were night and day better when I switched to the big lab.
This film was processed by Filmdev, a lab I have a lot of confidence in, used by many folk on TPFC. I really like the Noritsu scan, which I'll share soon. First I have to work out how to get the 3 sets of results from Mastodon onto here!
 
All the results so far it seems would be OK with some fine adjustments to suit personal tastes.

Nothing stands out as boing the best by far.

Two questions, what is boing hoped for, and why pay for specialised software unless there is a commercial reason to do so? (such as so much to scan that presets etc may be helpful)

It's interesting to see the different results, but the main thing I have learnt is that I don't need any "special" software or method, and it wouldn't help me to get better results :)
What is hoped for? I rather wanted to see if there are major differences in different conversion approaches, and there are... and are any of them as good as, or preferably superior to, the lab results. OK the second part is a pretty tall ask, and TBF I prefer the Filmdev Noritsu scans to the results here.

Why pay for additional software? Well, if I wasn;t using a lab for dev and scan, I might save a bit of money by scanning them myself. That's what I do with E6, or if I send black and white to a lab (as I have been doing for the past couple of months for various reasons). But although I often used to get not-terrible C41 scans when I was using SilverFast 6, I'm much less successful with Vuescan. I recently found that scanning E6 into Vuescan RAW and then processing that with Capture One Pro gave me results I much preferred to the straight Vuscan scans. So that's the stimulus for this.

But mostly, I thought it would be interesting... and it is!
 
Nice idea. Some quick and dirty conversions.. 2 for each 48bit raw. One in Vuescan (x32, v.9.6.47, all defaults, wb left on auto), the other in Colorperfect 2.25 (all defaults, Agfa Vista 200 profile). All images resized and converted to jpeg.

Guess which is which.

#1.1
uZuj1b4.jpg

#1.2
BWYRBUC.jpg


#2.1
OQo3GFB.jpg

#2.2
pU7nwhT.jpg


#3.1
QNIwpLH.jpg

#3.2
cf7rahc.jpg
Could you reveal which is which please, @trypdal ?

EDIT... All revealed in post #25?
 
Last edited:
First of the Mastodon results. Zabow (Mastodon handle @zabow@mastodon.bida.im) wrote "I played with one of the scans for two minutes and they look quite nice... " He used darktable negadoctor. EDIT: See https://mastodon.bida.im/@zabow/111733069616643902

I have captured the file from the Mastodon interface, changed the file from PNG to JPG and re-sized it for the forum...

Zabow darktable boots02.jpg
 
Last edited:
Second Mastodon result, from @kamerakata@ruhr.social (he said attribution via his handle was fine). He used Grain2Pixel version 5.3.8.3, which apparently is not quite current. See https://ruhr.social/@kamerakata/111733701439912201

He made two sets, the first from the Vuescan RAW files (first version, .tif), and the second from the Vuescan TIF files (I know, it's confusing!). EDIT: These were downloaded from Dropbox as TIFFs and re-sized and saved to JPEG with Affinity Photo.

(1) from RAW

Ralf Vista200RAW01_g2p0001.jpg

(1) From TIF

Ralf Vista200TIF01_g2p0001.jpg

(2) From RAW

Ralf Vista200RAW01_g2p0002.jpg

(2) From TIF

Ralf Vista200TIF01_g2p0002.jpg

(3) From RAW

Ralf Vista200RAW01_g2p0003.jpg

(3) From TIF

Ralf Vista200TIF01_g2p0003.jpg

Interesting!
 
Last edited:
Third Mastodon result, from Rom, handle @tapasinthesun@photog.social. Rom made a full manual conversion starting from the TIF files, in Capture One Pro. He wrote "I was intrigued about how my conversion would compare. So, I had a quick dabble. I just did a full manual conversion using Capture One, so I am not tied into any particular look. I know you liked the colour saturation in your photos, so I went for a more Ektar look. Personally, I prefer the Portra look (actually, I prefer black and white)."

He also did a Portra-style conversion, which for compactness I'm not showing, and then wrote: "Some observations:
- My DSLR scans are way sharper than the Plustek scans. The Plustek RAW ones might be better.
- The Mastodon compression has a significant effect on the image. The uploaded version has less detail and is flatter. It makes detailed comparisons difficult!
- I found it difficult as I had not seen the original scene, so I didn’t know how it looked. I had no idea what I was trying to replicate."

EDIT: I asked Rom how he did the conversion. He wrote "C1 only. I used to have custom colour neg conversion presets, but they were not great, and I rarely shoot colour film. I didn’t bother transferring them to my Mac.

Workflow is:
1. Convert to positive by inverting levels (has major blue tint)
2. Set white balance using the neg border (usually has a colour cast but getting there)
3. Use the colour balance wheels and colour editor, plus the usual contrast, brightness, etc.

Slow and fiddly, but it works. All my B&W is manual.

One thing I really noticed was that TIF is way inferior to Nikon NEF in C1. The worst affected is High Dynamic Range highlight adjustment. That is bad with TIF. The software is clearly designed for native RAW formats. This is nothing to do with your files, I had noticed this before. DNG is also not as good.

B&W is much easier. I shoot tethered using a similar approach (without the colour adjustments). I use my custom presets for the conversion on the fly, then tweak to my preferences."

These images from https://photog.social/@tapasinthesun/111737728502133954

Downloaded from the Mastodon interface and re-sized, but some came out over 500 KBytes so needed a second re-sizing with Affinity Photo, so I'm not sure how much that will affect the results. See above link for originals.

(1) "Ektar" look

Rom C1Pro Ektar 1.jpg

(2) "Ektar" look

Rom C1Pro Ektar 2.jpeg

(3) "Ektar" look

Rom C1Pro Ektar 3.jpg
 
Last edited:
In the first post, I asked about "any of ColorPerfect/ColorNeg, CNMY, darktable negadoctor, Grain2Pixel, Negative Lab Pro/NLP, ScanConvert or any other software". Thanks to the volunteers here, we have

- ColorPerfect from @trypdal
- darktable negadoctor from Zabow @zabow@mastodon.bida.im
- Grain2Pixel from @kamerakata@ruhr.social
- Negative Lab Pro from @FishyFish
- (Filmomat) SmartConvert from @trypdal
- Vuescan version from @trypdal
- Manual conversion in Capture One Pro from Rom @tapasinthesun@photog.social
- [EDIT] Conversion with Irfanview from @Sangoma

I have not been able to find anyone with CNMY!

My thanks to all of you. I thought I should put in some effort as well, so I have done some versions using Vuescan from the RAW DNG file, which I'll put up before long. (I also tried loading ther Vuescan RAW into Affinity Photo... it loads, opens the Develop module... and I couldn't work out what to do next!)
 
Last edited:
In the first post, I asked about "any of ColorPerfect/ColorNeg, CNMY, darktable negadoctor, Grain2Pixel, Negative Lab Pro/NLP, ScanConvert or any other software". Thanks to the volunteers here, we have

- ColorPerfect from @trypdal
- darktable negadoctor from Zabow @zabow@mastodon.bida.im
- Grain2Pixel from @kamerakata@ruhr.social
- Negative Lab Pro from @FishyFish
- (Filmomat) SmartConvert from @trypdal
- Vuescan version from @trypdal
- Manual conversion in Capture One Pro from Rom @tapasinthesun@photog.social

I have not been able to find anyone with CNMY!

My thanks to all of you. I thought I should put in some effort as well, so I have done some versions using Vuescan from the RAW DNG file, which I'll put up before long. (I also tried loading ther Vuescan RAW into Affinity Photo... it loads, opens the Develop module... and I couldn't work out what to do next!)


Did you leave out IrfanView because it is free :)
 
Back
Top